
Deploying to Azure with Pulumi from Github Actions
Let’s say we’re building a new service and are tasked with spinning up the infrastructure required to run our application. We’ve already defined this infrastructure as code in our favourite programming language with Pulumi. The only thing left to do is setting up a gitops flow to automate the deployment of this infrastructure. In this post, I’ll walk you through the steps of setting up a gitops flow with GitHub actions and automatically deploy any changes to Azure on each commit.
Creating a workflow
First, we’ll need to create a set of workflows that run each time code gets pushed to a repository. For the first workflow let’s create a file .github/workflows/pull_request.yaml at the root of the repository. This workflow will run pulumi preview for each PR that get’s created and give an overview of the proposed changes. Pulumi has a github action that makes it really easy to integrate it into your workflow with a simple uses statement. They extensivly walk you through getting this setup in their docs, but sometimes it doesn’t give you the flexibility you need and thus for this workflow let’s go through the process of installing Pulumi from scratch:
name: PRon: - pull_requestjobs: preview: name: Preview runs-on: ubuntu-latest steps: - name: Checkout uses: actions/checkout@v2 with: fetch-depth: 1 - name: Install Infra run: | curl -fsSL https://get.pulumi.com | sh echo "/home/runner/.pulumi/bin" >> $GITHUB_PATH - name: Preview Pulumi run: | pipenv sync pipenv run pulumi preview --stack stack-name env: ARM_CLIENT_ID: ${{ secrets.ARM_CLIENT_ID }} ARM_CLIENT_SECRET: ${{ secrets.ARM_CLIENT_SECRET }} ARM_TENANT_ID: ${{ secrets.ARM_TENANT_ID }} ARM_SUBSCRIPTION_ID: ${{ secrets.ARM_SUBSCRIPTION_ID }} PULUMI_ACCESS_TOKEN: ${{ secrets.PULUMI_ACCESS_TOKEN }} PULUMI_CI: prIt’s possible to define multiple jobs in a GitHub workflow, for now, we just have one defined named preview that will run on a ubuntu box. In the steps section, we defined multiple commands that will get executed in sequence. We check out the repository for the branch this workflow is running on after which we install Pulumi and add it to our PATH. And the last step we run the pulumi preview command, this step contains a set of environment variables which I’ll explain later. Next, let’s add a second workflow .github/workflows/main.yaml that runs on each commit to your main branch. It will run pulumi up and be responsible for making sure that each change will actually get deployed to Azure.
name: Mainon: - pull_requestjobs: preview: name: Preview runs-on: ubuntu-latest steps: - name: Checkout uses: actions/checkout@v2 with: fetch-depth: 1 - name: Install Pulumi run: | curl -fsSL https://get.pulumi.com | sh echo "/home/runner/.pulumi/bin" >> $GITHUB_PATH - name: Deploy Infra run: | pipenv sync pipenv run pulumi preview --yes --stack stack-name --suppress-outputs env: ARM_CLIENT_ID: ${{ secrets.ARM_CLIENT_ID }} ARM_CLIENT_SECRET: ${{ secrets.ARM_CLIENT_SECRET }} ARM_TENANT_ID: ${{ secrets.ARM_TENANT_ID }} ARM_SUBSCRIPTION_ID: ${{ secrets.ARM_SUBSCRIPTION_ID }} PULUMI_ACCESS_TOKEN: ${{ secrets.PULUMI_ACCESS_TOKEN }} PULUMI_CI: upA service principal to authenticate
Now that we’ve got these two common workflows defined, we’ll need to configure a set of secrets. Secrets are exposed as environment variables to the GitHub Actions runtime environment. Minimally, we’ll need to supply a Pulumi access token to allow the Pulumi CLI to communicate with the Pulumi Service on our behalf. To authenticate with Azure to deploy our changeset we’ll need to create a service principal inside our Azure Active Directory. To do this we will need to drop down to our Azure CLI (it’s also possible to create a service principal via the azure portal). Running az ad sp list will list all service principals configured in the Azure tenant. This could be quite a list, so it might help to run az ad sp --show-mine to just scope it to your own service principals. If this is the first principal you create this list will be empty. When combined with jq it’s possible to generate a more digestible list:
az ad sp list --show-mine | jq '.[].displayName'There are two types of authentication available for service principals: password-based authentication, and certificate-based authentication. To create a new service principal with password-based authentication run the following command:
az ad sp create-for-rbac --name <my-service-principal>Replace <my-service-principal> with something to easily help identify what this service principal is used for. As you can see password-based authentication is assumed by default and a random password is generated for you. To create a service principal with certificate-based authentication have a look at the Azure docs here. By default it will scope this service account to the current subscription, which you can verify with az account show.
The command will return a result similar to the following. Make sure to take note of these values because we’ll need them later and can’t be retrieved again once they have been set.
{ "appId": "123", "displayName": "my-service-principal", "name": "http://my-service-principal", "password": "456", "tenant": "tenant-id"}If do you ever lose access to these credentials, executing
az ad sp credential reset --name <app_id>allows you to reset them.
We just need to grab one more thing and then we can start mapping some of these values to the right environment variables.
az account list | jq '.[] | select(.name == "<subscription-name>") | .id'This will return the id of the subscription where you want to deploy your resources. Now that we have everything ready we can match everything up to environment variables as follows:
ARM_CLIENT_ID→ appId returned when creating the service principalARM_CLIENT_SECRET→ password returned when creating the service principalARM_TENTANT_ID→ tenant returned when creating the service principalARM_SUBSCRIPTION_ID→ subscription id obtained viaaz account list
With the workflow configured and our secrets readily available, head over to the repo’s Settings tab, in there you will find the Secrets area:
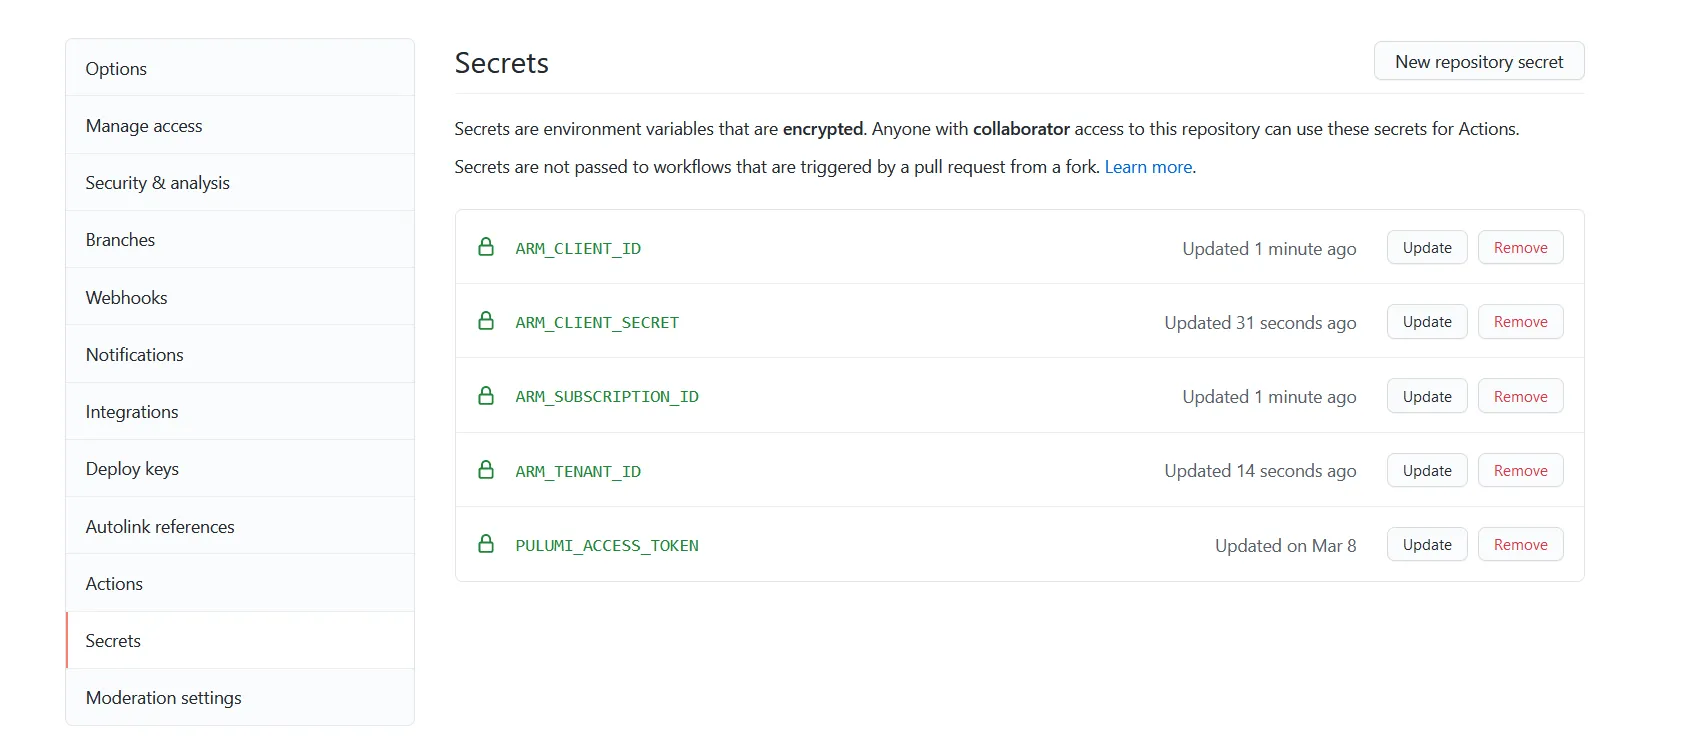
Via this page, it should be possible to create a secret for ARM_CLIENT_ID, ARM_CLIENT_SECRET, ARM_TENANT_ID and ARM_SUBSCRIPTION_ID. Look back at the table with vars we mapped out before, it will help fill out this form.
Try it out
And that’s basically it, we should be all set now. To trigger this workflow simply create a Pull Request or commit, and you will see these new actions showing up in the usual GitHub Checks dialog, with a green checkmark if everything went as planned. And have a look at the Pulumi docs, it shows you how you can leverage the Pulumi GitHub App and make the pulumi preview command comment on your PR so that you don’t need to look at the specific update logs to see if there were any changes.